Support the Work

If you have found the information on this blog useful, enjoyable, candid, or inspirational ... help keep it reader supported, journalistically driven, available to all, and advertiser-free. If you are able and inspired to do so, please consider a subscription to this blog. You can drop a dime or two every month, every year, or whenever you feel moved.

It will keep me writing, gathering facts, and interviewing the experts.

Love,

Elisabeth

CLICK HERE TO SUPPORT THE WORK

Parent / Sponsor


NEED TO FIND SOMETHING?
Join The Email List

Get Tastiness to Your Inbox

* indicates required

A blog about all things allergen-free and delicious

Entries in egg-free (10)

Tuesday
Feb042014

Honey-Infused Chocolate Covered Bacon (using raw cacao)

In the last post, we learned that yes, you can cook bacon naked, and without peril to your naughty bits, if you simply cook it in the oven. It's easy, saves time, does not splatter, and this method helps you save or toss the grease without mess. For this chocolate-covered bacon recipe, you need evenly cooked bacon that stands at attention, so using the oven is the best way to acheive this.

We've also learned that bacon can stop an argument on a dime, just by its mere mention. If this legend is indeed true, then chocolate covered bacon will one day bring about world peace.

For those of you who have removed cane or beet sugar from your diet, the ganache for this recipe is made from honey, and you will love it.

Ingredients

Here is what you will need:

(Double this recipe for 1 lb of bacon. If using more than one pound, make the ganache in batches for 1 lb of bacon at a time)


 Recipe

In your small saucepan or stove-safe ceramic dish, bring the coconut oil and honey to a boil by placing the burner on high. It will start to bubble like this:

 

Keep the pan on the stove until the honey and oil come to a full boil like the picture below. Let it boil for 30 to 45 seconds. No more than 60 seconds as you do not want this to burn. When cold, the ingredients will be separated, but after boiling they will come together and make a sort of caramel.



Let the honey and oil mixture cool for 5 minutes. If you place the raw cacoa powder in too early, you may burn it. The mixture should be warm but not hot. When at the right temperature, slowly add in the raw cacao powder a little at a time, stirring to completely incorporporate the chocolate/cacao into the mixture. Keep adding until you get the proper spreading consitency. You will get the right consistency somewhere between 1/8 and 1/4 cup of cacao. I like it a little thicker (so I use almost the entire 1/4 cup), you may like it a little thinner. If you don't use it all, return the extra to the package to use later!
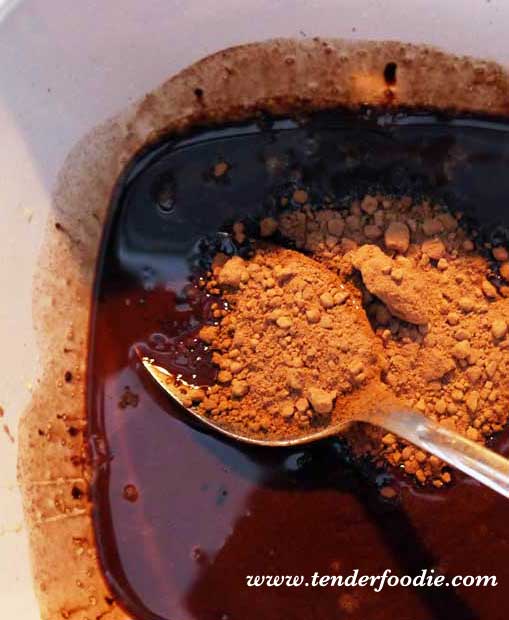
 

The consitency of the chocolate mixture will look something like this. It will slowly drip off of the spoon, and will be easy to spread.  
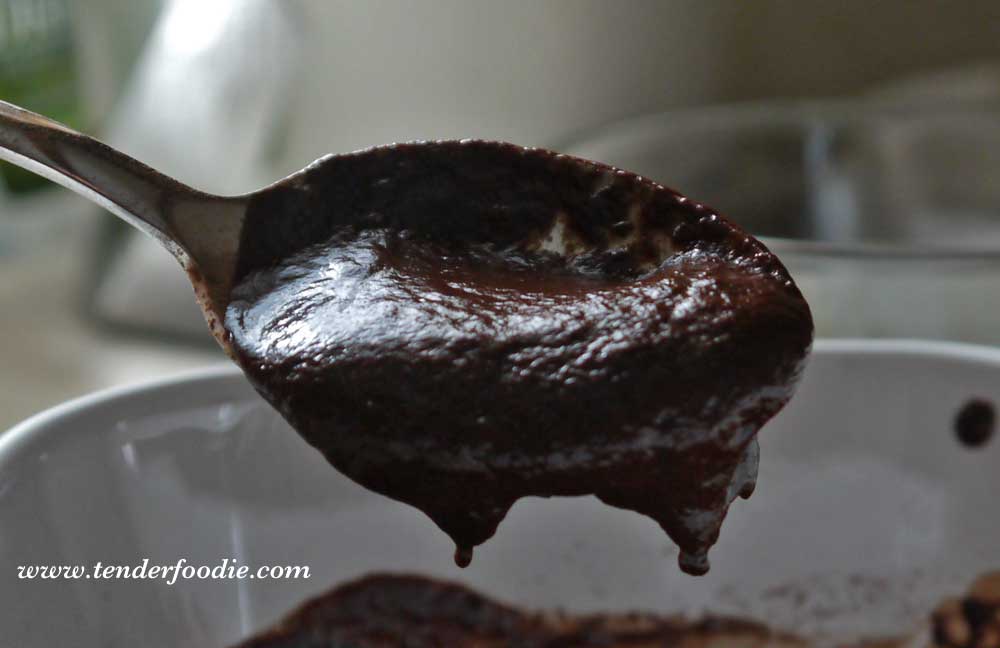
 

Lastly, break the cooked bacon strips in half and using a spoon, spread the chocolate onto one side of the bacon, half way up the strip. Make it a nice thick coat, using the bacon like a spoon. Chocolate lovers can put the chocolate side down on their toungue, while bacon lovers may put the bacon side on their toungue. Each will give you a slightly different experience. Covering one side also helps make the bacon look good on the plate right away. You don't have to use a separate plate to wait for the chocolate to harden and then waste a bunch of chocolate on the plate.

After it hardens a bit, place in the refrigerator, covered, for an hour or overnight. Served best chilled.

Enjoy!  (and have the leftovers for breakfast, seriously).



Wednesday
Jan082014

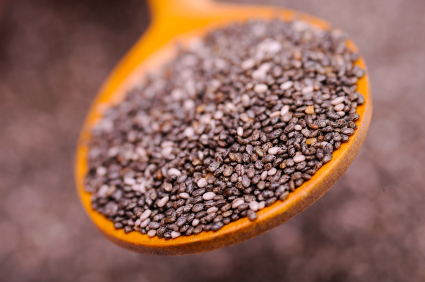
Use Ground Chia Seed Powder as an Egg Replacer!

Whole Chia Seeds - Grind before using as egg replacer

Just Like Flax Seed Only Better

Ground flax seeds are becoming a common and very successful replacement for eggs, but did you know that you can also use chia seed powder?

I've been experimenting with this for the last several months (recipes coming soon) and the ratio of chia powder to liquid is 1 to 1, just like ground flax seed. In other words, 1 tablespoon (TBS) of ground chia seeds + 1 tablespoon (TBS) of water = 1 egg.

You can also use coffee or clear apple juice instead of water to add a little recipe appropriate flavor if making muffins or sweet breads.

Can you use whole chia?  You can, but chia seeds soak up a ton of water, so your bread or muffins will be more like pudding - very, very moist. So if you want your muffins to turn out like muffins, grind your chia seeds in a coffee grinder or food processor first, then measure.

Higher in Omega 3's

Using chia seeds rather than flax also helps increase the ratio of non-fish-derived Omega 3's in your diet, since chia is heavier in Omega 3's than is flax seed.

Gluten-free & Allergen-Free Chia Seeds

UPDATE 5/13/16

Navitas started producing tapioca in their factories some time ago, so I am no longer able to use their products because I have an anaphylactic response to tapioca. however, I picked up a package this week to show a friend, and the allegen statement has changed. It states that it processes  in a factory that also produces wheat, dairy, peanuts and more. Please check with the company and the label to be sure that this product is safe for you to consume if you are sensitie or allergic to the top 8 allergnes.


Finding a gluten-free chia seed manufacturer can be tough.  I've had good luck with Navitas Naturals Chia Powder.  Here is the information that I have received from Navitas Naturals, organized by allergen:

  • No Gluten: not sourced or processed with gluten, and there is no gluten in the factory, but also not tested. In the process of getting gluten-free certification and performing a ppm test for gluten-free certification. Navitas Power Snack line is gluten-free certified.
  • No Dairy: no dairy is present in the facility, but not tested for dairy at this time.
  • Tree Nuts:  facility processes tree nuts, but handles cashews only.
  • Soy: We do not test for parts per million for soy or peanuts. Our superfoods come from around the world and are grown in natural, native habitats. The risk for cross contamination with gluten, soy, or other legumes is extremely low and/or unlikely.
  • Peanuts: We do not test for parts per million for soy or peanuts. Our superfoods come from around the world and are grown in natural, native habitats. The risk for cross contamination with gluten, soy, or other legumes is extremely low and/or unlikely.
  • Sulfite Free: None of Navitas Naturals products contain sulfites
  • Organic: All products are certified organic and use minimal processing methods such as freeze-drying. The facility is certified organic.
  • GMO StatusNavitas Naturals products are Non-GMO Project Verified! That means they’ve met the rigorous standards of the Non-GMO Project- an independent non-profit reviewer that ensures products are made according to best practices for GMO avoidance. Organic Facility. Under current FDA regulations, no GMOs are allowed in organic foods.
  • Certified Kosher: "Most of our products are certified kosher through Earth Kosher. You can find more information at www.earthkosher.com."

Read the labels for your particular allergens at:  http://navitasnaturals.com

UPDATE 5/13/16

Navitas started producing tapioca in their factories some time ago, so I am no longer able to use their products because I have an anaphylactic response to tapioca. however, I picked up a package this week to show a friend, and the allegen statement has changed. It states that it processes  in a factory that also produces wheat, dairy, peanuts and more. Please check with the company and the label to be sure that this product is safe for you to consume if you are sensitie or allergic to the top 8 allergnes.

Monday
Jun172013

Recipe: Chocolate Squash Muffins (grain-free, egg-free, dairy-free, soy-free)

Grain/Gluten-free, Dairy-free, Soy-free, Egg-free

Copyright & Photos: Elisabeth Veltman, The Tender Foodie


If food were fashion (and we know that it is) then squash is the new black. Squash makes very moist, healthy, and yummy muffins. Loaded with antioxidants, magnesium, B Vitamins, and iron; you can serve these muffs for breakfast or have them hanging around as snacks. I think you might like paleo muffins even better than regular 'old wheat muffins. I do!

Inactive prep time: 1 hour
Prep time: 15 min.
Cook time: 35-45 min.
Makes 12 muffins

Preheat the oven to 350 degrees F.

Ingredients


1 cup mashed butternut squash or acorn squash (roasted and peeled), or mashed pumpkin flesh (my favorite to use is Tropical Traditions Organic Pumpkin in a box).

1 small banana (or half of a large one)

4 TBS ground flax mixed with 8 TBS filtered water & left for 5 minutes to gel (this is your egg replacer)
 
½ cup almond butter (can also use a nut-free sunflower butter)

¾ cup honey

¼ cup coconut oil, melted (if your almond butter is very oily, you may need to leave this out, if the almond butter is very dry, leave it in.)

½ cup dairy-free raw cacao powder (make sure it is dairy- & gluten- free if you have guest w/ these allergies). I use Navitas Raw Cacao Powder.

½ cup coconut flour (exactly - sift out the lumps before you measure)

½ TBS of gluten-free cinnamon (McCormick brand) - Learn more about spices

1-teaspoon gluten-free, aluminum-free baking powder

1-teaspoon baking soda

1-teaspoon gluten-free vanilla extract

1-teaspoon gluten-free chocolate extract

¼ teaspoon of sea salt

Optional: add 1 cup of Enjoy Life mini chocolate chips for extra sweetness.


Instructions

1.    Vent the squash (poke several holes with a knife), the roast the squash whole at 425 degrees for about 1 hour or until a knife easily pierces through the center.  Cool.  Cut In half and use a spoon to scoop out the seeds.  Then scrape out the flesh into a measuring cup.
2.    Preheat the oven to 350 degrees F.
3.    Grease a 12 muffin tin with coconut oil, or use paper muffin cups
4.    In a food processor (this works better for paleo than a blender) combine the squash, banana, almond butter, flax seed mixture, honey, and coconut oil. Add the vanilla and chocolate extracts. Blend well.
5.    In a separate bowl, whisk the coconut flour, raw cacao powder, baking powder, baking soda, cinnamon, and sea salt, then add it to the wet ingredients and blend well.
6.    Scoop into the muffin cups filling to the top.
7.    Bake for 35 minutes.  A toothpick will come out moist with a little crumble.

Let muffins cool, and then remove from tin and nom.


*Please note: coconut is a drupe, not a nut, but some people are allergic to coconut (and the oils), so please double check with your nut-allergic guest to be sure that they can eat coconut.


ABOUT ELISABETH

Writer, owner of Blue Pearl Strategies, and lover of all culinary delights, Elisabeth started The Tender Palate & Tender Foodie, for people with food allergies, sensitivities and intolerance. She believes that everyone should live deliciously and have a healthy seat at the table.

Friday
May182012

Kyra's Baking Class: Replacing Common Ingredients

Welcome to New guest blogger, Kyra Bussanich!  Kyra is the first gluten-free winner EVER of the Food Network's Cupcakes Wars and owner of Crave Bake Shop in Portland Oregon.  Once a month will be helping us with tips and tricks to allergen-free baking -- how lucky are we!  Plus, she will be sharing some of her wonderful recipes.  Thank you for jumping on the blog, Kyra, and for becoming part of the Tender Foodie community.

~ Elisabeth Veltman

The Three Legs of Baking

There are three legs to fantastic baking: gluten, eggs, and sugar.

Each contributes something to the texture and structure of the final product, and when you have already replaced one of the legs of the stool, it makes it more difficult to successfully swap out the remaining two legs without adversely affecting flavor or texture (or both).  This is why gluten-free and egg-free baking present such a challenge. 

So in this first post, I'm going to offer an overview of replacements for some of the common allergens in baking, offer my opinions on them, and help you understand how they react together.  This kind of understanding is a first step in making some baking magic in the kitchen.


Egg Replacements

I personally am not a fan of egg-replacers in bread, or most baked goods that need structure.  Sandwich bread, for instance, needs a lot of structure.  That said, you can swap out things like ground flaxmeal for the eggs, but it WILL affect the flavor and the texture. That's not to say it can't be delicious; but it WILL be different.


Yeast Replacements (for Rising)

To replace yeast, I use mechanical leavening in the form of baking powder or baking soda.

If you use baking soda, there should be some sort of acid to enact the baking soda (vinegar, apple cider viegar, lemon juice). The trick is to get the bread to rise without tasting too tangy from the baking soda and acid.


My Favorite Gluten-Free Flours

I adore millet flour, sorghum, teff, quinoa (which is spendy) and sweet white rice flour (mochiko)!  I prefer teff flour over buckwheat for that dark, almost nutty taste and texture!


Difference in Gluten-Free Flours

When formulating our products at Crave, I really went back to basics and studied the protein content of the different "gluteny" flours and how that affected the texture of the baked goods. 

For instance:

Pastry flour: has a relatively low protein content of around 9% which helps make very light, flaky crusts and cookies. 

Bagels:   are made with "high-gluten" flour which has a protein content of 14% to make the bagels dense and chewy.

These differences in protein may not seem like much, but when you think about the finished product (like pie crust versus bagels) you see that the protein content of the flours results in completely different textures. I'm simplifying a lot here, but the point I'm making is that instead of using a one-stop "all purpose" mix for everything, I tailor each recipe according to the texture I want the finished product to have, and I select various gluten-free flours and starches based on their protein content.

So, when I'm making bagels, I want them to have a higher protein content than our cakes, so I use sorghum and millet flour (and sometimes teff), instead of starchier components. I realize this doesn't adequately answer this question, so let me retrace my steps...

The Protein Differences in Gluten-free Flours

Because gluten-free flours tend overall to be very refined and starchier than wheat flours, and because they are missing that vital protein for structure and elasticity, it is imperative to add extra protein or binders into gluten-free bread recipes.

Sometimes I simply add additional egg whites; sometimes I use xanthan gum, and sometimes I use psyllium seeds. I've heard of other places also using gelatin for stretch, but I don't prefer to go that route.


Xanthan Gum -- How it works & What to Replace it With

Xanthan gum is a binder, acting much in the way of gluten in terms of holding everything together. And just like gluten, the more you work it, the stronger it acts (so don't overmix your dough)! With xanthan gum, as with gluten, baked goods will shrink up after they're baked if you've played with the dough too long or too vigorously.

Other binding agents: guar gum, ground psyllium seeds, gelatin, agar agar...the list goes on!

Dairy Replacements

Rice milk, or almond milk, if you can tolerate nuts. Coconut milk if you're making a sweeter bread or for dinner rolls.  Or, you could just use eggs and no milk at all, if you can tolerate the eggs!


No "One Size Fits All" Replacement Method

I find that there is no all-purpose formula for replacements (I know you don't like this answer!).  A lot of it depends on the ratio of flours to hydration, what you're using to hydrate, and then the other ingredients that are present in the recipe. I'm sorry I can't be more help, but sometimes I find that I might need 1 tablespoon of xanthan per cup of flour or starch and other times that's just way too much and 1/4 teaspoon will do.  See what I mean?


Hopefully this answers some of your "why's" and "wherefore's" of how allergen-free baking is different.  I'll see you next month with more tips.  If you have any questions, post them here!  Or give the Tender Foodie an E-Jingle.  I'll do my best to include answers to them in upcoming posts whenever possible!


About Kyra

Kyra Bussanich is the owner of Crave Bake Shop, and the first gluten-free winner of the Food Network's Famed, "Cupcakes Wars".  Kyra graduated with honors from the prestigious Le Cordon Bleu patisserie program, which gave her a solid foundation of knowledge about classical French baking techniques which she was able to apply toward baking gluten-free.  Kyra was diagnosed with an auto-immune disorder when she was 20 years old. Part of staying healthy meant switching to a gluten-free diet, avoiding all wheat and overly processed foods. Whenever possible, she uses local ingredients, and serves customers with multiple allergies, as well.

Thursday
Feb092012

RECIPE: Black Bean & Sweet Potato Soup (Vegan, DF, GF, Nut-free, Soy-free)

Here is another great recipe from Chef Jenny Brewer, that uses the winter powerhouse called "Sweet Potato".  Chef Jenny will start guest blogging for us in March (2012), with cooking tips and recipes for Tender Foodies of all kinds.  I'm very excited to have Chef Jenny lending her expertise! 

Prep


Serves 6-8
Preparation Time:  
20 mins
Cooking time:  
35 mins


Ingredients


1 Tablespoon olive oil

1 medium red onion, chopped

1 anaheim pepper, chopped

2 cloves garlic, minced

2 sweet potatoes (1 1/2 lbs),peeled and cut into 1/2-inch cubes

1 28-can whole plum tomatoes

1 cup water or vegetable stock

2 15-ounce cans black beans, drained

1 dried chipotle pepper (smoked jalepeno), seeded and chopped (easiest to do with scissors)

1 teaspoon cumin

1 teaspoon chili powder

1/2 cup chopped fresh cilantro leaves


Recipe

Warm the oil in a large pan over medium heat and add the onion, pepper, garlic, and sweet potato chunks. Saute, stirring often, until onions are soft, about 5 minutes.
Add the tomatoes, breaking them up with the back of a wooden spoon.  Add water or stock, beans, chipotle, cumin, and chili powder, bring to boil, reduce heat to simmer, cover, and cook for 30 minutes, or until sweet potatoes are tender.  Stir in cilantro and serve.


About Chef Jenny Brewer

Jenny Brewer is a nutritionist and chef who believes eating healthy should be easy, delicious and fun! She inspires individuals to stay committed to eating healthy with her free healthy eating resource, Tasty Bites with Chef Jenny available at www.jennybrewer.com.


More Recipes from Chef Jenny

Not Your Mamma's Chocolate Mousse Tart (super allergen-free, healthy & delish, delish, delish)